Many features of the XOVI Suite require you to set up a project first. We explain how to go about it!
The quickest way to set up a new project in XOVI is to head to the Project Management menu at the very top of the screen in the white header section and select “Create project”. You are taken directly to the project wizard.
Create project

Alternatively, access the project wizard via the main menu on the left hand side. In the lower section of the menu, you will see the “Projects” section. Click here to access an overview of all your projects as well as the orange “Add a project” button.
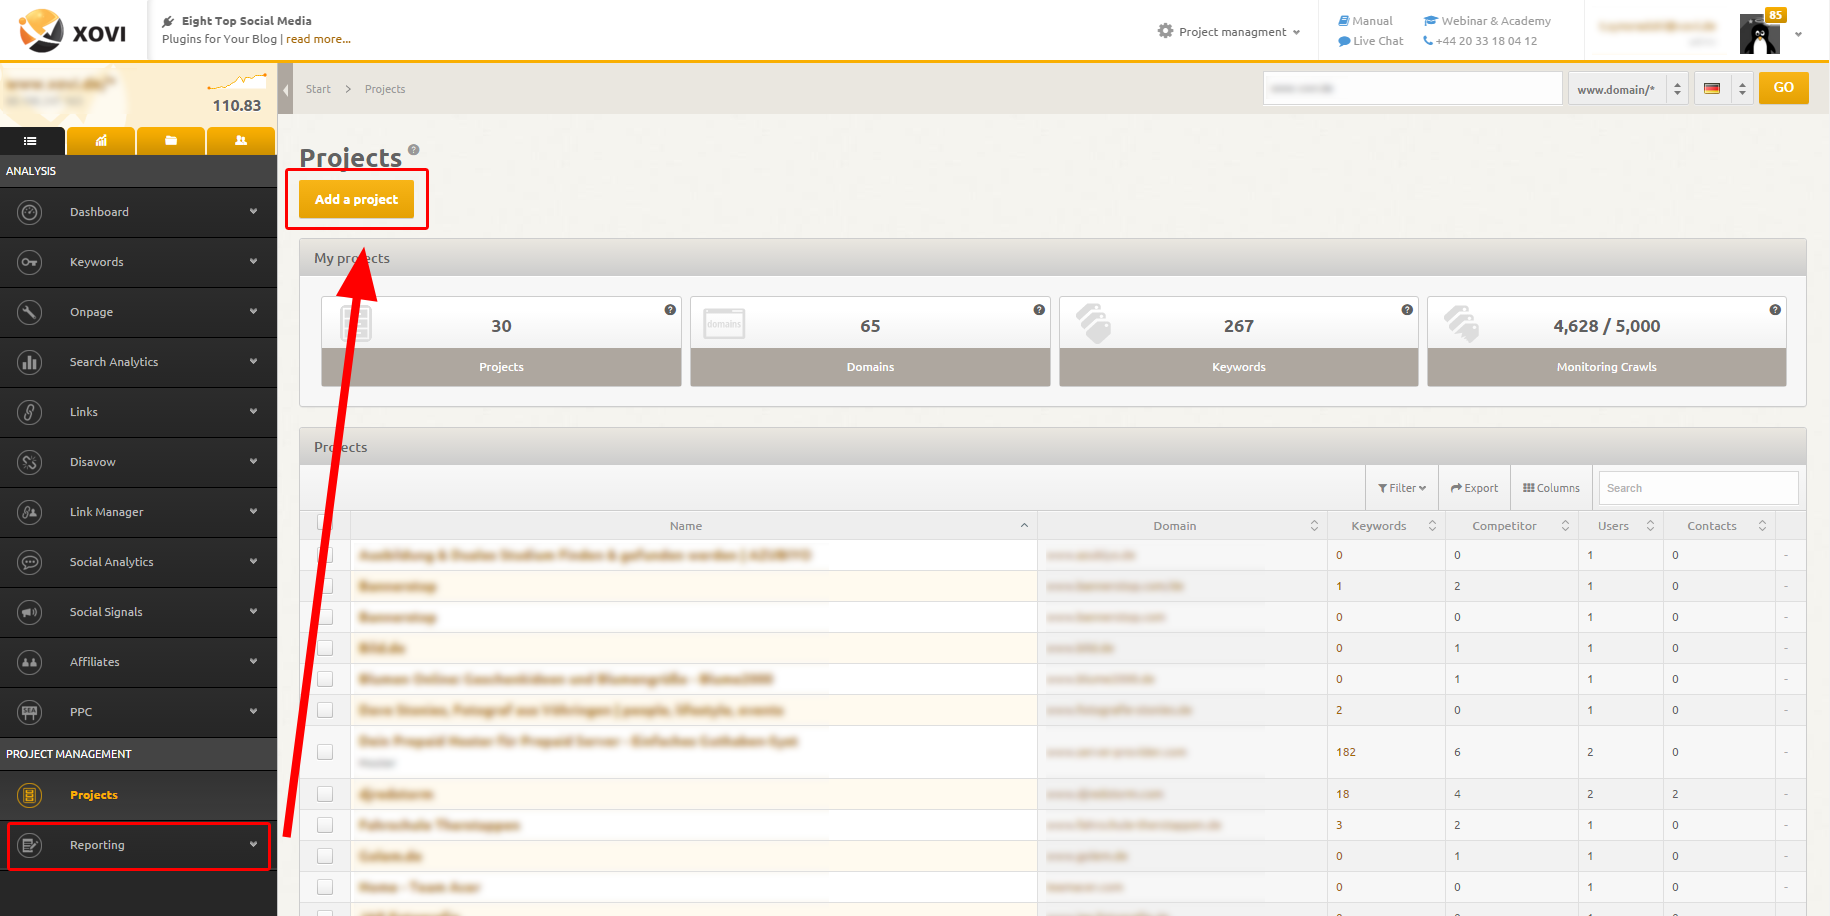
Please note: In the XOVI Suite, a project refers to one domain. It is often the case that agencies refer to customers with several different domains and subdomains internally as “projects.” However in the XOVI Suite, each individual domain and subdomain should be added as an individual project. This makes sense when it comes to running on-page analyses or adding keywords for keyword monitoring. Let’s use the wizard to set up a new project together.
Six steps to setting up a project
- Enter domain
- General settings such as project name and description
- Add competitors
- Enter keywords for monitoring
- Add social profiles
- Alerts settings and completion
1. Enter domain
The domain entered here is the equivalent of the domain you would enter if running a one-off domain analysis in the search bar. For this tutorial, we shall be using the popular greeting cards website moonpig.com – or more precisely, www.moonpig.com. Enter the full domain in the field marked “domain” and select the default analysis type (in this case, “exact domain, all directories”).
In the menu just below, selected the default search engine for the project. As a British company, it makes sense to select google.co.uk, but you may want to set up the project based on results on for google.com instead. Since autumn 2015, XOVI provides keyword and search engine data for nine international search engines. Whatever you choose here, you can always alter the settings later on.

2. General settings
Click on “Next” to proceed to step two – general project settings. XOVI will automatically check whether the domain actually exists and whether it can read the meta title and description from the HTML code on the domain’s homepage, in which case the fields are filled automatically.
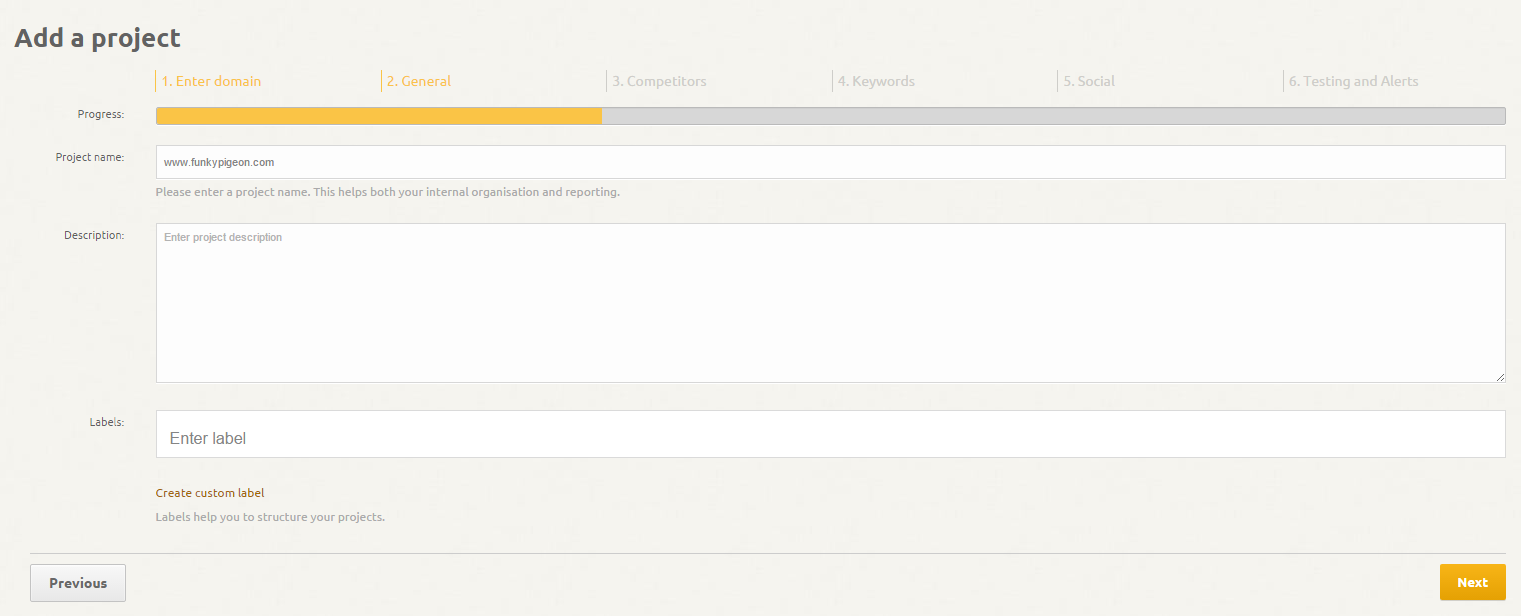
The XOVI Suite uses the meta title for the project name and the meta description for the project description. This information can be edited at any time. You could use the description field to enter notes about the project, for instance. Beneath the description field, you can assign labels to the project.
Once you’re happy with the general settings, click on “Next”.
3. Competitors
In step three, enter your competitor domains against which you would like to compare your domain in this project. Either add suggested competitor domains identified by XOVI or enter any the Suite may have missed. As everyone knows from the TV adverts, Moonpig’s big rival is surely Funky Pigeon and these two behemoths of the greetings cards and gifts industry make for an ideal comparison in our XOVI tutorial. So add www.funkypigeon.com and any others from the suggestions list, and click on “Next.”
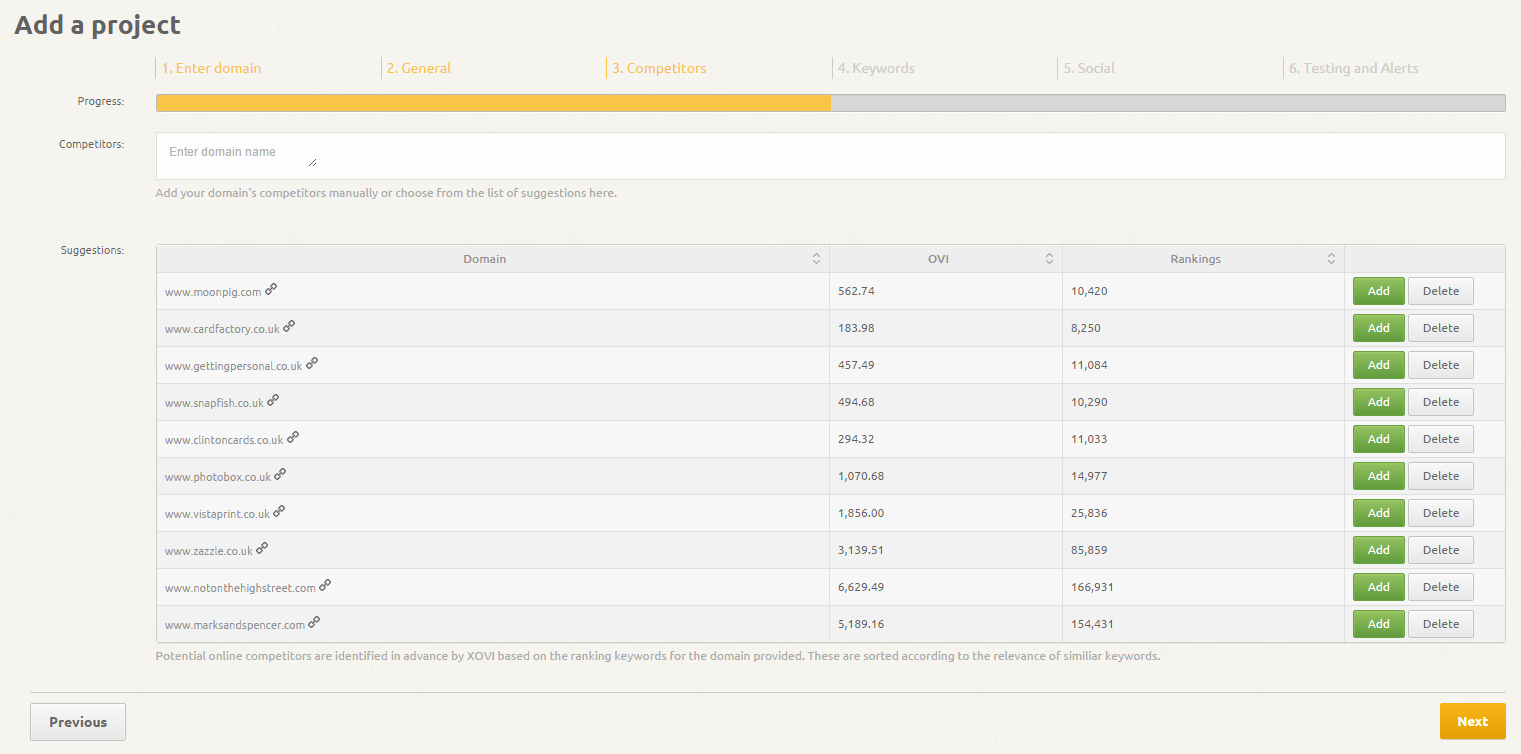
Remember, you can add as many comparison domains as you like and you can always come back and add more later on if you forget any. The project wizard is there to help you get started – nothing is set in stone!
4. Keywords
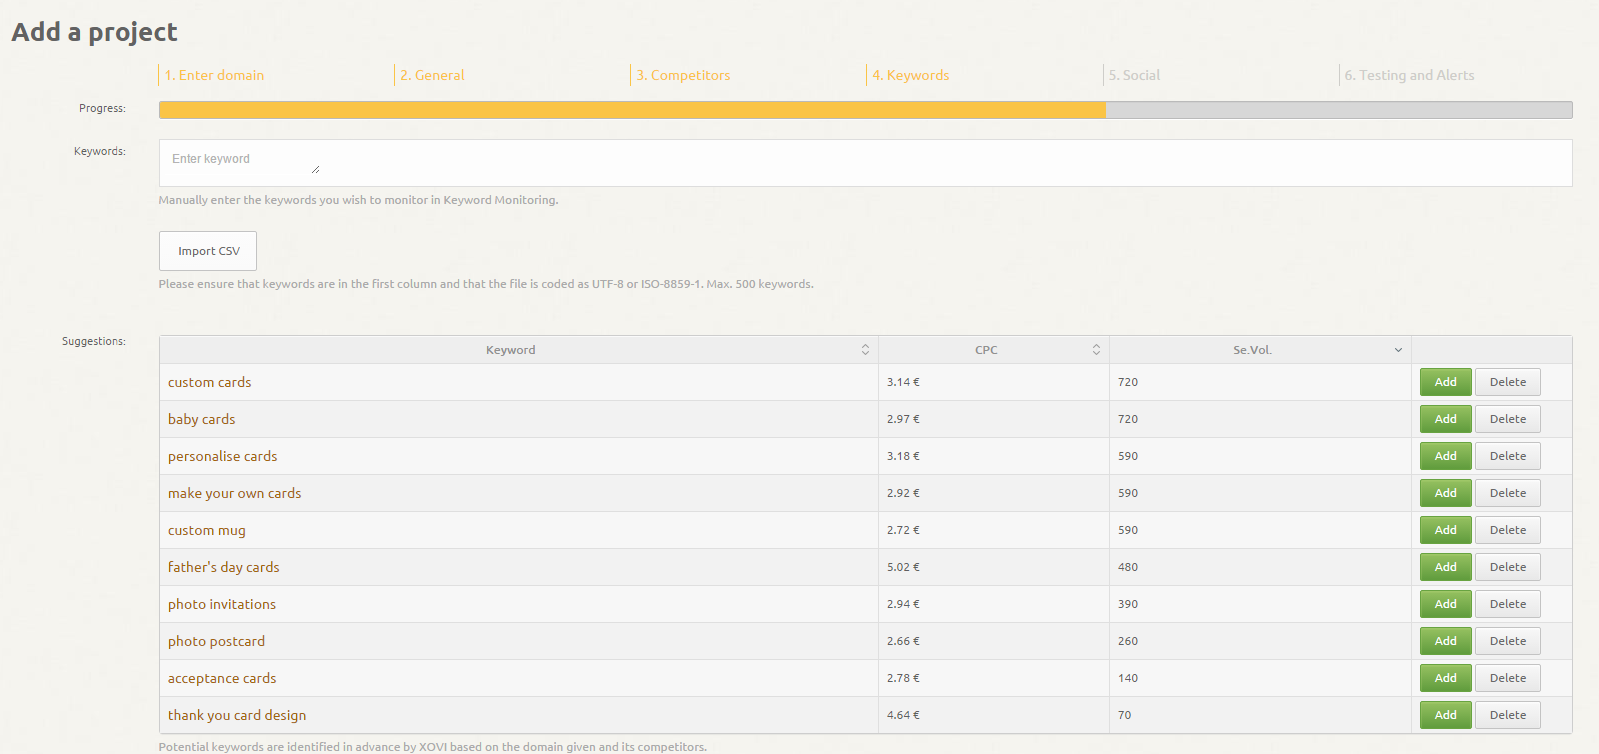
Now it’s time to add some important keywords for tracking in XOVI’s Keyword Monitoring tool. Once again, the XOVI Suite suggests important keywords for your domain which you may wish to monitor more closely. Alternatively, upload a list of keywords which you have already determined to be most important for your project. Set the search engines in which keyword performance should be monitored, the devices on which they should be monitored (since Google’s algorithm differs slightly), and the days on which crawling should take place. You can add keywords and configure all of these settings later on in the Monitoring Tool itself.
5. Social profiles
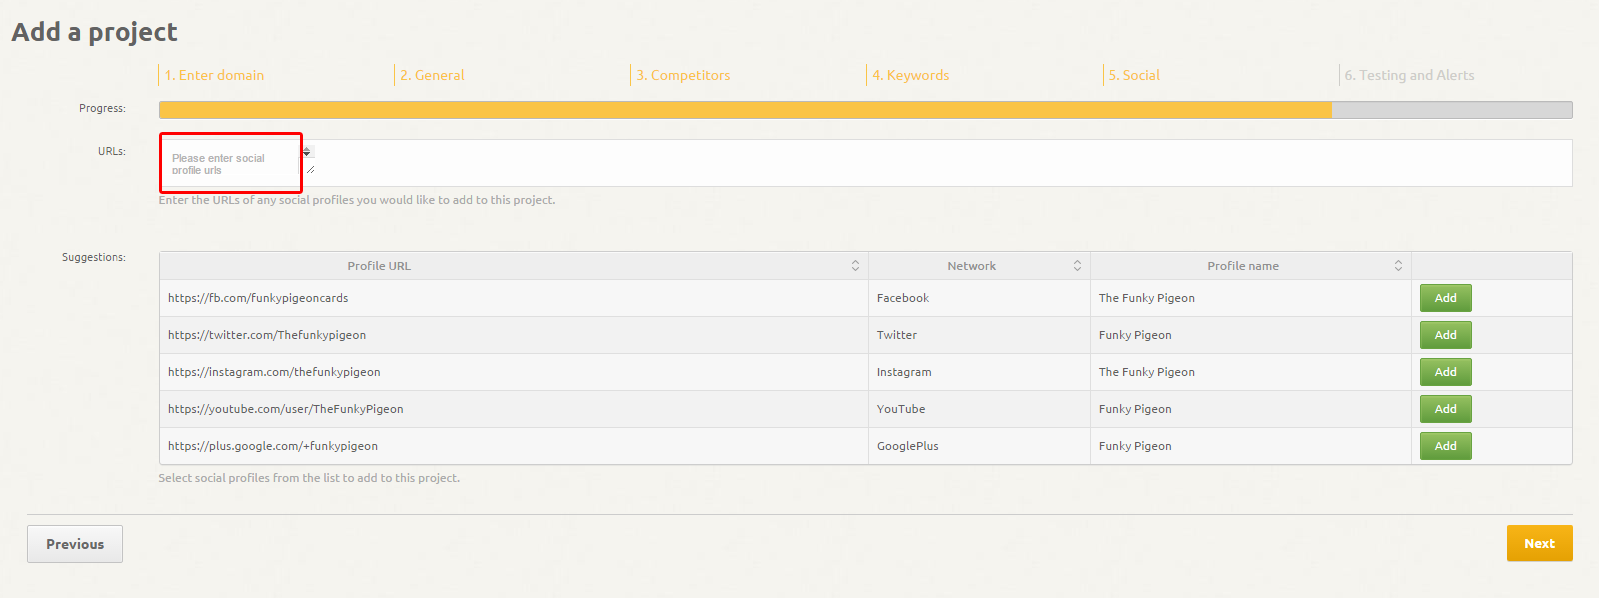
XOVI has been offering social media monitoring via its Social Analytics tool since autumn 2015. The Social Analytics tool allows you to keep track of all the key performance indicators (followers, subscribers, fans, likes, shares, etc) for social media profiles related to your domain – and even competitor profiles which you don’t “own”! As in the previous steps, XOVI automatically tries to identify related social profiles for you but if yours doesn’t appear, simply enter the profile’s URL in the field at the top.
6. Testing and alerts
The final step in setting up your project contains two important settings. Firstly, decide whether to launch an immediate on-page analysis of your domain in XOVI’s On-Page Tool (or you can start an on-page analysis separately later on if you wish). Secondly, set any alerts for the project. If you switch alerts to “on” using the orange button, you will receive all important notifications for the project. These can be adjusted and changed under “notifications” later on.

Finally, don’t forget to “Save project”! You’d be amazed how many people spend time carefully configuring their project only to accidentally delete everything!

